


Years ago, installing a CB radio in your vehicle was a highly technical and convoluted process. Radio devices were invented more than a hundred years ago.
But today? It’s easier than ever to install it yourself. Whether you drive a pickup, a Jeep, or a semi, it’s worth taking on as a project.
If your initial reply to all of this is summed up by ‘Nope,’ you can also get yourself to Walcott and we’ll get it installed for you!
CB Types
There are three main types of CB radios:
- Handheld
- Base Stations
- Mobile Radios
We’ll be focusing on mobile radios for your vehicle in this guide, but most of these principles apply to all CB radio types.
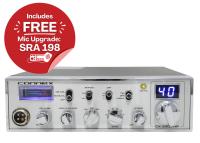
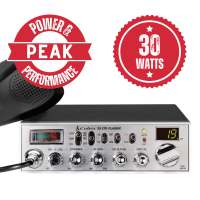
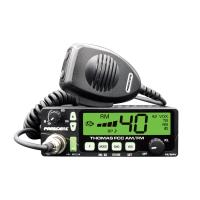
Mobile radios are all pretty much the same in that they’re all limited to 4 watts of power, so we’re already in for an easy start. The only real difference between them comes down to features. We have them all listed in the next part of this guide.
CB Radio Features
NOAA
Short for National Oceanic and Atmospheric Administration, NOAA broadcasts nationwide through many local stations. These broadcasts include current weather forecasts, hazard alerts, and general safety information 24/7.
PA (Public Address)
A PA feature allows you to connect your CB radio to external speakers. It can be used for your own high-volume listening or as a communication tool for drivers in your surroundings. Either way, it’s loud.
Gain
Gain controls the sensitivity of the receiver, which is useful for filtering out weaker signals that create background noise. Adjusting gain properly makes stronger signals come through much clearer.
Squelch
Squelch eliminates the static noise you hear between actual broadcasts. Think of it like a rug you can sweep all that unwanted noise under.
ANL (Automatic Noise Limiter)
ANL stands for Automatic Noise Limiter. It blocks unwanted noise from interfering signals or any other source that isn’t a proper CB transmitter, further improving the audio quality of incoming transmissions.
Auto 9/19
This feature provides fast access to the popular channels 9 and 19. Channel 9 is the emergency channel, while channel 19 is the trucker channel. It’s also worth noting that in some areas, channel 19 is designated for truckers on north- and southbound routes while channel 17 covers east- and westbound routes.
Backlit Controls
You can control everything just fine by feel, but wouldn’t it be great to see all those knobs and controls at night? Backlighting is a simple but genuinely comfortable feature to have.
Didn’t Choose Your CB Radio Yet?
In this guide we’re not going to elaborate too much on choosing a CB radio. Consider the following if you haven’t decided yet:
Size
One size definitely does not fit all. It all depends on the amount of space you have in your vehicle. From a motorcycle to a truck and everything in between, figure out how much room you have available before purchasing.
Features
Consult the feature list above and decide what you need. If you’re a trucker, you’re probably going to want all of them.
Still undecided? Give us a call or just walk in and we’ll find the best CB radio for your needs.
Enough Chit-Chat — Time to Pull Out the Toolkit!
As the old saying goes, measure twice, install once. Let’s go through it step by step.
Find a Home for Your CB Radio
Keep it within reach
If you can’t control it, it ain’t close enough. Before you set everything up, it’s important to decide where to mount the CB radio. Putting it near your rearview mirror is a bad idea. Behind you or beneath your seat is even worse.
Keep it in clear sight
It’s nice to be able to see which channel you’re on, and you’ll want to understand the current controls and knob positions at a glance. Keep it in a clearly visible place, accounting for shadows and non-radio components like the gear stick or steering wheel.
Make sure you have quick access to your mic as well. You need to be able to reach it and pull the mic to your face to speak properly. A tangled mic cord can pose a serious hazard while driving.
Keep it safe
The usual suspects in any case of premature CB radio death are moisture, grime, dirt, and prolonged exposure to sun or rain. Your CB radio is an investment — make sure it’s safe and protected.
If your vehicle has a built-in slot or dock in the dashboard, great! If not, consider placing it mid-height on or in your dash for pickups and Jeeps. In larger vehicles, you might find it easier to mount near the ceiling.
Think about the center of your dash, placed high enough that a full soda cup next to it won’t be able to spill and cause damage.
Power It Up
You have a few options for powering your CB radio, depending on your electrical knowledge and willingness to experiment. Here they are from simplest to most advanced:
- Cigarette port adapter
- Wire to fuse box
- Wire to battery
Cigarette Port Adapter
Power your radio through the cigarette outlet with a cheap adapter that connects to any 3-pin standard CB radio power cable. If your CB radio doesn’t have a 3-pin power cord, consider getting an adapter that supports bare wire connections, or move on to the next solution.
Fuse Box
The fuse box of a vehicle is essentially a power outlet hub. See if you can wire your CB radio to it directly. If you don’t have an open slot, you can get a fuse tapper, which works like an electrical outlet splitter for your vehicle. Disconnect one of your existing components, connect the fuse tapper, reconnect what you just removed, and plug the CB radio power connector into the newly added slot.
Go Straight to the Source
Wire your CB radio directly to your vehicle’s battery. The hot wire should connect to the battery’s positive terminal, and the ground wire should go to either the battery’s negative terminal for best results, or to any metallic component (usually the chassis) that is properly grounded.
Powering your CB radio through the battery’s terminals provides the best results in terms of reception and minimal interference.
Time to Set Up the Antenna
So your CB radio is resting comfortably in its new mount. Hopefully you followed our recommendations above. Don’t activate it yet — we still have work to do. We need to set up an antenna.
Antennas — How Do They Work?
Generally speaking, the antenna is the most important component in your entire CB radio system. Choosing the right antenna and mounting it properly will make or break your ability to communicate clearly.
You can divide CB antennas into two main categories:
- Grounded antennas
- Non-grounded antennas (NGP)
You can also look at it from a material perspective:
- Fiberglass antenna
- Whip antenna
- Base station antenna
Whip and fiberglass antennas differ in weight and flexibility. Fiberglass antennas can generally be longer, but are less flexible and heavier than whip antennas.
Ground Plane Antenna
Antennas send and receive radio waves. When an antenna is mounted on the roof of your vehicle — assuming it’s metallic and properly grounded — your entire roof effectively becomes part of the antenna. Wherever you mount the antenna becomes the center from which radio waves propagate in all directions.
In practical terms, this means that if your antenna is off-center, it affects your ability to send and receive transmissions from the direction the antenna is closest to. The larger the ground plane the antenna has in a given direction, the better reception and transmission will be in that direction.
Ideally, you would want to place the antenna in the center of your roof.
What’s the downside?
You may need to remove paint, rustproof, and weatherproof your newly drilled chassis. Yes, you will need to drill into the center of your roof to properly electrically ground your antenna to it.
You want your antenna to be as high as possible without risking collisions with trees, low overpasses, or other obstacles.
If you decide to place the antenna on other parts of the vehicle, make sure you can drill and properly electrically ground it to a metallic surface.
Either way, it is recommended that the antenna extend at least two-thirds above the roofline of your vehicle.
No Ground Plane Antenna (NGP)
If your vehicle isn’t metallic enough, has a sunroof in the way, or is something like an RV, you might want to opt for a no ground plane (NGP) antenna.
These antennas are potentially weaker than grounded ones, but they don’t require mounting on a grounded metallic surface because the grounding is built into the antenna and coax cable. It’s important to note that NGP coax cables and antennas are not interchangeable with ground plane versions.
Antenna Length
Longer is better — until it gets unwieldy and starts catching on things it shouldn’t.
As a general rule, the ideal antenna length is one quarter of the CB radio wavelength, which comes out to about 8.5 feet. To make that practical for driving without hitting every overpass and tree in the country, antenna manufacturers use coils to increase the antenna’s effective electrical length without making it physically longer.
Coils can be positioned at the base, middle, or top of the antenna. These configurations are referred to as base loaded, center loaded, and top loaded. The key thing to remember is that the coil should be placed above the roofline for best performance.
Additional Antenna Placement Options
On large trucks, it’s common to see the antenna placed on the driver side, mounted on the rearview mirror bracket, above the doorframe, or on the driver side of the hood.
For Jeeps, popular mounting locations include the driver side of the hood, mounted on tail lights, or even on the spare wheel carrier.
Some specific use cases call for dual antennas. Running dual antennas can be beneficial but requires significant width between them, so we’re saving dual antenna setups for more advanced guides.
Antenna Mounts
Some antenna mounts use magnets, while most require drilling. Smaller antennas can be held by magnetic mounts, but make sure the mount is rated for the antenna’s weight — the smallest mistake can leave your antenna orphaned on the highway. We’ve got mounts for trucks, Jeep Wrangler, Rubicon, and pretty much any other vehicle from any year. Check out our full selection of CB antenna mounts.
Important: Don’t drill or permanently settle on a position for your antenna until you check SWR. We’ll explain that below.
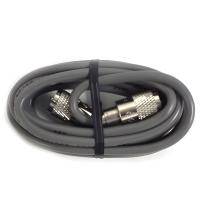
Connecting the Coax Cable
Alright, listen up — it’s time to connect the cable.
Route the coax as cleanly as possible and try to keep it looking neat. Make sure not to run it next to other electrical lines or devices in the vehicle, as that can cause interference. Remember: the coax cable is also effectively part of the antenna system.
Coax cables should be 18 feet long. Most CB antennas are calibrated to that specific length. Depending on the distance from the antenna to the radio, you’ll likely have some leftover cable. Store it neatly in a figure-8 pattern. Do not roll it into a circle, as that will cause the coiled cable to act as an antenna on its own and create interference.
Check beforehand that the connector fits your antenna. If it doesn’t, you’ll need a different cable or an adapter.
Standing Wave Ratio (SWR)
Time for the big test. Without delving too deep into the physics, the standing wave ratio (SWR) determines how effective your CB radio’s reception and transmission will be.
The closer to a 1:1 ratio, the better. A ratio of 2:1 or higher poses a risk and can damage your CB radio if you continue to operate it at that level.
Move your vehicle to an open area with no walls or other obstructions. Follow the instructions on your integrated or separate SWR meter.
You might need to adjust the antenna position or shorten/lengthen it in ⅛-inch increments until you reach the best ratio possible. This is the most important step in the entire installation, and it should determine the final position and configuration of your antenna and coax.
That’s It — Enjoy Your Newly Installed CB Radio!
You’re all set. Enjoy your newly installed CB radio — you’re definitely going to have a good time with it.
Need any more assistance or information? Visit us at Walcott Radio or contact us by phone or through the website.